World War I (1914-1918)

Landing at Cape Helles
The landing at Cape Helles was part of the amphibious invasion of the Gallipoli peninsula by British and French forces on 25 April 1915 during the First World War. Helles, at the foot of the peninsula, was the main landing area. With the support of the guns of the Royal Navy, the 29th Division was to advance six miles (9.7 km) along the peninsula on the first day and seize the heights of Achi Baba. The British were then to go on to capture the forts that guarded the straits of the Dardanelles. A feigned landing at Bulair by the Royal Naval Division and a real landing at Anzac Cove were made to the north at Gaba Tepe, by the Australian Australia, officially the Commonwealth of Australia, is a sovereign country comprising the mainland of the Australian continent, the island of Tasmania, and numerous smaller islands. In 1770, the British explorer James Cook mapped and claimed the east coast of Australia for Great Britain, and the First British Fleet arrived in 1788 to establish the penal colony of New South Wales. Australia sent many thousands of troops to fight for Britain during WWI. and New Zealand
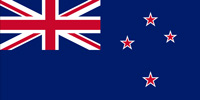 The Dominion of New Zealand was the historical successor to the Colony of New Zealand. In 1841, New Zealand became a colony within the British Empire. Subsequently, a series of conflicts between the colonial government and Māori tribes resulted in the alienation and confiscation of large amounts of Māori land. New Zealand became a dominion in 1907; it gained full statutory independence in 1947, retaining the monarch as head of state. Army Corps before dawn and a diversionary landing was made by French forces at Kum Kale on the Asiatic shore of the Straits. After dark another demonstration was made by the French in Besika Bay.
The Helles landing was mismanaged by the British commander, Major General Aylmer Hunter-Weston. V and W beaches became bloodbaths, despite the meagre defences, while the landings at other sites were not exploited. Although the British managed to gain a foothold ashore, their plans were in disarray. For two months the British fought several costly battles to reach the first day objectives but were defeated by the Ottoman army.
Ottoman Developments
At the beginning of the 20th century, the Ottoman Empire The Ottoman Empire, also known as the Turkish Empire, was an empire that controlled much of Southeast Europe, Western Asia, and Northern Africa between the 14th and early 20th centuries. The Ottomans ended the Byzantine Empire with the conquest of Constantinople in 1453. The Ottoman Empire's defeat and the occupation of part of its territory by the Allied Powers in the aftermath of World War I resulted in its partitioning and the loss of its Middle Eastern territories. was called the sick man of Europe; weakened by political instability, military defeat and civil strife following a century of decline. Power had been seized in 1908 by a group of young officers, known as the Young Turks, who installed Mehmed V as a figurehead Sultan. The new regime implemented a program of reform to modernise the political and economic system and redefine the national character of the empire. Germany
 The German Empire, also referred to as Imperial Germany, the Second Reich, as well as simply Germany, was the period of the German Reich from the unification of Germany in 1871 until the November Revolution in 1918, when the German Reich changed its form of government from a monarchy to a republic. During its 47 years of existence, the German Empire became the industrial, technological, and scientific giant of Europe. provided significant investment and its diplomats gained more influence at British expense, previously the predominant power in the region and German officers assisted in training and re-equipping the army. Despite this support, the economic resources of the empire were depleted by the cost of the First and Second Balkan Wars and the French, British and Germans offered financial aid. A pro-German faction influenced by Enver Pasha, the former Ottoman military attaché in Berlin, opposed the pro-British majority in the Ottoman cabinet and tried to secure closer relations with Germany. In December 1913, the Germans sent a military mission to Constantinople, headed by General Otto Liman von Sanders. The geographic position of the Ottoman Empire meant that its neutrality in the event of a European war was of significant interest to Russia
 Russian Empire was an empire and the final period of the Russian monarchy from 1721 to 1917, ruling across large parts of Eurasia. The rise of the Russian Empire coincided with the decline of neighbouring rival powers: the Swedish Empire, the Polish–Lithuanian Commonwealth, Qajar Iran, the Ottoman Empire, and Qing China. Russia remains the third-largest empire in history, surpassed only by the British Empire and the Mongol Empire., France
 French Third Republic was the system of government adopted in France from 4 September 1870, when the Second French Empire collapsed during the Franco-Prussian War, until 10 July 1940, after the Fall of France during World War II led to the formation of the Vichy government. During the 19th and 20th centuries, the French colonial empire was the second largest colonial empire in the world only behind the British Empire. and Britain
 The British Empire, was composed of the dominions, colonies, protectorates, mandates, and other territories ruled or administered by the United Kingdom and its predecessor states. At its height it was the largest empire in history and, for over a century, was the foremost global power. By the start of the 20th century, Germany and the United States had begun to challenge Britain's economic lead. .
During the July Crisis in 1914, German diplomats offered an anti-Russian alliance and territorial gains in Caucasia, north-west Iran and Trans-Caspia. The pro-British faction in the Cabinet was isolated, due to the British ambassador taking leave until 18 August. As the crisis deepened in Europe, Ottoman policy was to obtain a guarantee of territorial integrity and potential advantages, unaware that the British might enter a European war. On 30 July 1914, two days after the outbreak of the war in Europe, the Ottoman leaders agreed to form the Ottoman-German Alliance in secret against Russia, although it did not require them to undertake military action. On 2 August, the British requisitioned two modern battleships, Sultân Osmân-ı Evvel and Reşadiye which were being built for the Ottoman Navy in British shipyards, alienating supporters of the British in Constantinople, despite the offer of compensation if they remained neutral. During the strained diplomatic relations between the two empires, the German government offered two cruisers, SMS Goeben and SMS Breslau to the Ottoman navy as replacements. The Allies conducted the Pursuit of Goeben and Breslau which escaped, when the Ottoman government opened the Dardanelles to allow them to sail to Constantinople, despite being required under international law, as a neutral party, to block military shipping.
In September, the British naval mission to the Ottomans, which had been established in 1912 under Admiral Arthur Limpus, was recalled as it appeared that the Ottomans would soon enter the war and command of the Ottoman navy was taken over by Rear Admiral Wilhelm Souchon of the Imperial German Navy. On 27 September, the German commander of the Dardanelles fortifications unilaterally ordered the passage to be closed, adding to the impression that the Ottomans were pro-German. The German naval presence and the success of German armies in Europe, gave the pro-German faction in the Ottoman government enough influence to declare war on Russia. On 27 October, Goeben and Breslau, having been renamed Yavûz Sultân Selîm and Midilli, sortied into the Black Sea, bombarded the port of Odessa and sank several Russian ships. The Ottomans refused an Allied demand to expel the German missions and on 31 October 1914, formally entered the war on the side of the Central Powers. Russia declared war on Turkey on 2 November, the next day the British ambassador left Constantinople and a British naval squadron off the Dardanelles bombarded the outer forts at Kum Kale and Seddulbahir. A shell hit a magazine, knocked the guns off their mounts and killed 86 soldiers. Britain and France declared war on 5 November and the Ottomans declared a jihad (holy war) later that month, beginning the Caucasus Campaign against the Russians, to regain former Turkish provinces. Fighting also began in Mesopotamia, following a British landing to occupy the oil facilities in the Persian Gulf. The Ottomans prepared to attack Egypt in early 1915, to occupy the Suez Canal and cut the Mediterranean route to British India and the Far East.
Allied Strategy and the Dardanelles
By late 1914, the race to the sea in France, a war of manoeuvre, had ended and trench lines had been dug from the Swiss border to the English Channel. The German Empire and Austria-Hungary Austria-Hungary, often referred to as the Austro-Hungarian Empire, the Dual Monarchy, or Austria, was a constitutional monarchy and great power in Central Europe between 1867 and 1918. Austria-Hungary was one of the Central Powers in World War I, which began with an Austro-Hungarian war declaration on the Kingdom of Serbia on 28 July 1914. closed the overland trade routes between Britain and France in the west and Russia in the east. The White Sea in the Arctic and the Sea of Okhotsk in the Far East, were icebound in winter and distant from the Eastern Front. The Baltic Sea was blockaded by the Kaiserliche Marine (Imperial German Navy) and the entrance to the Black Sea through the Dardanelles was controlled by the Ottoman Empire. While the empire remained neutral, trade with Russia continued but the straits were closed before the Ottomans went to war and in November mine laying was begun in the waterway.
Aristide Briand made a proposal in November, to attack the Ottoman Empire, which was rejected and an attempt by the British to pay the Ottomans to join the Allied side also failed. Later that month, Winston Churchill, First Lord of the Admiralty, proposed a naval attack on the Dardanelles, based in part on erroneous reports of Ottoman troop strength. Churchill wanted to use a large number of obsolete battleships, which could not operate against the German High Seas Fleet, for an operation against the Dardanelles, with a small occupation force provided by the army. It was hoped that an attack on the Ottomans would also draw the former Ottoman territories of Bulgaria and Greece into the war, on the Allied side. On 2 January 1915, Grand Duke Nicholas of Russia appealed to Britain for assistance against the Ottomans, who were conducting an offensive in the Caucasus. Planning began for a naval demonstration in the Dardanelles to divert troops from the Caucasian theatre.
Prelude
Ottoman Defensive Preparations
The naval operations in the Dardanelles ended with the failure on 18 March, to push a naval force through the straits, during which three battleships were sunk and four capital ships were severely damaged by naval mines laid along the Asiatic shore. Preparations began for a landing to help the navy neutralise the forts and batteries guarding the straits but the preparations in Egypt were not concealed, the French commander even spoke of it in an interview with an Alexandria newspaper. On 24 March, Enver Pasha the Ottoman Minister of War unified the military forces around the Dardanelles, under the command of Marshal Otto Liman von Sanders and the Fifth Army headquarters. On arrival at Gallipoli, Liman ordered that the garrisons in the peninsula be concentrated and the 5th and 7th divisions were moved to Bulair. The 9th Division was deployed in the southern part of the peninsula, from Suvla Bay to Sedd el Bahr and the 11th Division garrisoned the Asiatic shore (the 3rd Division was sent later as a reinforcement). Near Boghali, the 19th Division was stationed as a reserve, under the command of the 5th Army headquarters, ready to move to Bulair, Gaba Tepe or the Asiatic side according to developments.
Liman emphasised a policy of mobile defence by the divisions in the three defensive areas, rather than persist with the attempt to guard the coast with continuous defences and the redeployment was carried out by night, to evade scrutiny by Allied reconnaissance aircraft. The 9th Division under Colonel Halil Sami Bey, deployed its forces according to the new defence scheme, creating a northern zone from the mouth of Aghyl Dere, north of Ari Burnu to Semerly Tepe, occupied by the 27th Regiment and some mountain artillery and a southern zone from Semerly Tepe to Sedd el Bahr, garrisoned by the 26th Regiment. The 25th Regiment was placed in reserve on the Kilid Bahr plateau near Serafim Farm, able to intervene in either zone. In the northern defence zone, the 27th Regiment commander Lieutenant-Colonel Ali Chefik Bey put the 2nd Battalion on the coast, with two 120 mm guns at Gaba Tepe and two 150 mm guns further inland; the 1st and 3rd battalions were held in reserve near Maidos (until bombed on 23 April, after which they were moved to an area within 1.5 miles (2.4 km) of Gaba Tepe). In the southern defence zone, Lieutenant-Colonel Kadri Bey the 26th Regiment commander, created three battalion areas, a northern or "Kum Tepe sector" from Semerly Tepe to Sari Tepe occupied by the 1st Battalion, with three companies supported by a field battery on the coast and a company in reserve, with two 150 mm guns south of Gaba Tepe.
In the central "Krithia sector", the 2nd Battalion covered the area from Sari Tepe, to the mouth of Gully Ravine and from Sedd el Bahr to the mouth of Tenkir Dere. One company was placed on the Aegean coast and one near Morto Bay, the other two were put in reserve at Kanli Dere, south-east of Krithia at the regimental headquarters. On the west bank of Kereves Dere, a battery of 105 mm howitzers commanded the Straits. The southern "Sedd el Bahr sector", ran from Gully Beach to Sedd el Bahr and was garrisoned by the 3rd Battalion and a company of engineers which were working on the beach defences. One company guarded W Beach, a company was placed at Sedd el Bahr with four Maxim guns on high ground overlooking V Beach and two companies were in reserve on low ground north-west of Morto Bay; twelve men watched X Beach. At the three beaches where the British were to make large landings, there were two infantry companies and 4–6 machine-guns, with two infantry and one engineer company in reserve. On the Asiatic shore, the 3rd Division had two regiments near Troy and one from Kum Kale to Yeni Shehr; the 11th Division lay in reserve near Ezine, with detachments on either side of Besika Bay.
Allied plan
The purpose of the military operation was to assist the fleet to force the Straits, by taking from the rear the Ottoman forts on the European side of the Narrows and to obtain a vantage point, from which the forts on the Asiatic side could be dominated. The objective was the Kilitbahir plateau which covered the Ottoman forts in the Narrows and which ran in a semicircle most of the width of the peninsula, between Maidos and Soghanli Dere. The plateau ran from Kilitbahir westwards for about 4 miles (6.4 km) was about 2 miles (3.2 km) wide at its broadest point and 600–800 feet (180–240 m) high. The Ottomans had entrenched and wired the plateau and extended the fortifications south to Kakma Dagh ridge on the Straits and north to Gaba Tepe, forming a defensive line where the peninsula was 5 miles (8.0 km) wide and which dominated the Kilia plain to the south-west.
General Sir Ian Hamilton, commander of the MEF chose to make two landings with two diversions. The Anzac Corps would make a surprise landing between Gaba Tepe and Fisherman's Hut, with the covering force landing just before dawn, with no preliminary bombardment. After consolidating the left flank the force was to advance eastwards towards Maidos to cut Ottoman communications with the garrisons further south. On the Gallipoli peninsula on either side of Cape Helles, where the navy could provide support from three sides a covering force of the 86th Brigade and additional units would land and secure the beaches, then the main force would follow up and advance to the first day objectives, the village of Krithia and the hill of Achi Baba. Five beaches were selected for the landing, from east (inside the straits) to west (on the Aegean coast), S, V, W, X and Y beaches. V and W beaches were the main landings at the tip of the peninsula, either side of Cape Helles.
To the north of the Anzac landings a diversion was to be mounted at Bulair. The Royal Naval Division (RND) less two battalions, was to make a demonstration at the narrowest point of the peninsula, to induce the Ottomans to retain forces in the area during the main landings. A naval covering force would bombard the Bulair defences all day and one ship would make a close reconnaissance, with the transports visible in the background. To the south of the landings around Cape Helles, on the Asiatic shore at Kum Kale, a French regiment of the Corps expéditionnaire d'Orient would land temporarily at the same time as the 29th Division at Cape Helles, to distract Ottoman artillery on the Asiatic shore, confuse the Ottoman command and delay the dispatch of reinforcements from the Asia to Gallipoli, before withdrawing to join the main landings on the peninsula. Despite the assurance of a 1905 Admiralty report, that water was plentiful in the valleys, extensive preparations were made to maintain an adequate water supply. In April the Indian 9th Mule Corps arrived from France with 4,316 mules and 2,000 carts and in Egypt a Zion Mule Corps was formed from Jewish Russian émigrés from Palestine. The need for means to carry water was considered so urgent that in mid-April, a request was forwarded to Egypt for the Zion Mule Corps to be sent immediately, regardless of its lack of equipment.
Air operations
The Royal Naval Air Service (RNAS) aircraft of HMS Ark Royal, co-operated with the Anzac landing with seaplanes and a kite balloon and Number 3 Aeroplane Squadron RNAS, with 18 aircraft, flew in support of the operation at Helles. Standing patrols were maintained over Helles and the Asiatic coast, in perfect flying weather, each pilot making three sorties during the day, beginning at dawn. As soon as Ottoman artillery replied to the landings, the aircraft observers used wireless to direct naval gunfire but were ignored because the quantity of naval gunnery was overwhelmed by the number of Ottoman targets. When the troops had become established ashore, the ships responded to messages from the aircrews who used Very lights to signal to the ships unable to receive wireless transmissions. The flyers began bombing artillery, camps and troops, conducted photographic reconnaissance and kept watch on the peninsula up to Bulair and the Asiatic coast. The balloon rose at 5:21 a.m. and the two observers watched the troops climb the cliffs and then reported the presence of the battleship Turgut Reis in the Narrows, which was chased away by HMS Triumph. The airborne observers were hampered by the steep scrub-covered hills and sandy gullies but maintained the patrols all day.
V Beach
Covering force
V Beach was 300 yards (270 m) long and 10 yards (9.1 m) wide, with a low bank about 5 feet (1.5 m) high on the landward side. Cape Helles and Fort Etrugrul (Fort No. 1) were on the left and the old Sedd el Bahr castle (Fort No. 3) was on the right, looking from the sea and Hill 141 was inland. The beach had been wired and was defended by about a company of men from the 3rd Battalion of the 26th Regiment, equipped with four Maxim guns. The first ashore was the 1st Battalion, Royal Dublin Fusiliers which landed from ships boats that were towed or rowed ashore. The rest were landed from a Trojan horse, the SS River Clyde, a 4,000-long-ton (4,100 t) converted collier, which had eleven machine-guns on the bow. Sally ports had been cut in the hull to allow the men to embark via gangways. The ship held 2,000 men; the 1st Battalion of the Royal Munster Fusiliers plus two companies of the 2nd Battalion, the Hampshire Regiment (from the 88th Brigade) and one company of the Royal Dublin Fusiliers.
The tows containing the Dubliners were delayed by the current and came in thirty minutes late at 6:30 a.m. The shore appeared lifeless following the bombardment but as the boats were about to land, the Ottoman defenders opened fire. Guns in the fort and castle enfiladed the beach and killed many of the men in the boats, some of which drifted away with no survivors. Many more casualties were suffered as the Dubliners waded ashore and some wounded men drowned. The survivors found shelter under the bank on the far side of the beach but most of the landing boats remained grounded with their crews dead around them. Two platoons landed intact on the right flank at the Camber and some troops reached the village, only to be overrun. Of the 700 men in the landing, 300 were killed and many of the rest were wounded. The River Clyde grounded just before the tows and to connect the collier to the shore, a steam hopper, the Argyll a flat-bottomed boat, was to beach ahead of it to provide a floating bridge, connecting the gangplanks in the bow of the River Clyde to the beach but the Argyll swung out to port and ended up broadside to the beach. The captain of the River Clyde, Commander Edward Unwin, led men outside to manhandle three lighters (transport boats) on the starboard side forward instead. Two companies of Munsters emerged from the sally ports, covered by the machine-guns on the bow and moved down the gangways to reach the shore but many were hit by bullets. Some troops managed to get ashore and others were drowned due to the weight of their equipment. Around 9:00 a.m., another company made an attempt to disembark but after one company had got ashore, the casualties to the first two platoons were so great, that the effort was suspended until dark.
Main force
Hunter-Weston had watched the landings on W Beach from HMS Euryalus 1,000 yards (910 m) offshore but received misleading reports at 7:30 and 7:50 a.m. that the landings were succeeding. At 8:30 a.m. Hunter-Weston instructed the main force to land and at 9:00 the second wave waited for the tows to return from the shore, although few arrived. Wounded were removed and several platoons under Brigadier-General Napier sailed towards the beach. The calamity which had befallen the first wave was still unknown to Hunter-Weston, who at 9:00 a.m. had ordered the troops on River Clyde to move towards the left flank and the troops on W Beach. At 9:30 a.m. a company of the 2nd Hampshire tried to disembark but most were shot down on the gangways and the attempt was suspended. The vessel carrying Napier and his party was seen heading towards the beach and was called alongside the River Clyde, from where Napier saw many men on the lighters in front of the collier and jumped onto the nearest, unaware that the men were dead. Napier and his staff reached the hopper, were pinned down and Napier was killed a few minutes later. At 10:21 a.m. General Ian Hamilton, who had been watching the landing from the HMS Queen Elizabeth, instructed Hunter-Weston to suspend the landing at V Beach and divert the rest of the V Beach force to W Beach.
During the afternoon Queen Elizabeth, HMS Albion and HMS Cornwallis bombarded the Ottoman defences on V Beach, which had little effect on the volume of fire directed at the British. During another attempt to land from the River Clyde, when the bridge to the shore had been repaired at 4:00 p.m., few troops managed to reach the ledge beyond the beach. At 5:30 p.m. the battleships resumed the bombardment on the village, crest of the ridge and the upper works of the fort and at 7:00 p.m. about 120 men moved to the right flank and attacked the fort, where an Ottoman machine-gun crew repulsed the attack and forced the survivors back under cover. After dark the gangways of the River Clyde were cleared of dead and wounded, which took until 3:00 a.m. A surgeon on board the collier treated 750 men from 25–27 April despite being wounded in the foot. Around midnight, Hunter-Weston sent orders to attack Hill 141 but two liaison officers from Hamilton's staff reported that a night attack was impossible; onshore the troops were organised into three parties to attack at 5:00 a.m. after a bombardment by Albion.
The Ottoman defenders had an advantage in fighting from prepared positions, in the absence of surprise or accurate covering fire from the ships but experienced problems with communication and found that the artillery was out of range of the beach. Major Mahmut, the commander of the 3rd Battalion, 26th Regiment could not find the position of the landing for some time in the confusion. Calls for reinforcements from the 25th Regiment were not met until 1:00 a.m. on 26 April. A platoon commander Abdul Rahman, reported many casualties and at 3:00 p.m. the Ottomans at the fort and on the flank under Sergeant Yaha were forced back. The battalion lost half of its men and the morale of many of the survivors collapsed next day, when outflanked by the troops on S Beach. The Ottomans retired rapidly up the Kirte and Kandilere river beds, abandoning about seventy wounded men. Attempts to rally on the second line of defence failed and the survivors fell back to a line 1.5 kilometres (0.93 mi) from Krithia in the late afternoon. By 27 April the beach defenders had lost 575 casualties.
W Beach (Lancashire Landing)
Covering force
W Beach lay on the coast to the north-west of Cape Helles, just south of Tekke Burnu, the site of a small gully. An infantry company from the 3rd Battalion of the 26th Regiment defended the beach, which was about 350 yards (320 m) long and from fifteen–forty yards (14–37 m) wide, with steep cliffs at the ends and a relatively easy approach over sand dunes in the centre, to a ridge with a view of the sea. The Ottomans had mined the beach and laid extensive barbed wire entanglements, including one along the shore and trip wires just under the surface of the water, a few yards offshore. Trenches on the high ground overlooked the beach and two machine-guns were hidden in the cliffs, to cover the wire in enfilade. The ridge beyond the centre of the beach was commanded by entrenchments on higher ground to the north-east and south-west and 600 yards (550 m) away lay one of two redoubts close to Hill 138, both extensively wired and behind slopes with no cover. Another barbed-wire entanglement ran from the southern redoubt to the cliffs near a lighthouse which blocked an advance from W Beach towards V Beach.
The 1st Battalion of the Lancashire Fusiliers were embarked in the cruiser Euryalus and the battleship HMS Implacable, which took up positions off the beach. The troops transferred to thirty-two cutters at about 4:00 a.m. and Euryalus closed in on the beach at around 5:00 a.m. An hour later, the six tows from Euryalus sailed towards the shore, in line abreast at 50 yards (46 m) intervals, the tows from Implacable to the left. As the tows reached to within 50 yards (46 m) of the shore they were cast off and the sailors in the cutters began to row. The shore had been silent but as the first boat landed, Ottoman small-arms fire swept the British and caused many casualties. Euryalus and HMS Swiftsure lifted their bombardment ten minutes before the British landed and the Ottoman infantry had been able to emerge from cover. The survivors jumped from the cutters and tried to rush ashore but many leapt into deep water and sank under the weight of their equipment. The preliminary bombardment had not cut the wire along the shore and the surviving Fusiliers were fired on from three sides as they cut the wire or crawled underneath. A witness later wrote:
It appeared as if the whole battalion must be wiped out. The wire on the beach was intact and to those watching anxiously from the Euryalus the situation appeared hopeless. It looked as each man was shot down as he left his boat.
- Colonel Wolley-Dod
Small parties of Fusiliers got through the entanglement, reached the dunes behind the shore and captured the trenches beyond. Some of the tows from Implacable diverted towards the north side of the bay and landed unopposed. A small party climbed the cliff and occupied a trench on the top, drove off an Ottoman counter-attack and then engaged the Ottoman troops on the northern flank of the beach. Ottoman small-arms fire against the main landing began to diminish after a trench was hit by heavy shells from offshore; the Fusiliers cut more paths through the wire and attacked the cliff at the south end of the beach. Naval observers could see the trenches on the cliff top and as the British attacked the ships were;
raking the ground with shells, and the Turks were also killed by the hundreds as they retreated.
- Travers
By 7:15 a.m., the British had got far enough inland to deny the Ottomans observation over the area. On the northern flank, Brigadier-General Hare and the others who had outflanked the Ottoman defences to the north, advanced towards X Beach but after 200 yards (180 m) were engaged from Hill 114 and Hare was wounded. The second wave of tows had landed with few losses at around 7:30 a.m. and prepared to attack Hill 138 with the survivors of the first wave. An inaccurate map caused delay as Hill 138 turned out to have another crest 400 yards (370 m) to the south-west crowned with another redoubt. During the landing, compasses, binoculars and watches had been soaked which added to the confusion. Two parties attacked the redoubts but were repulsed as troops on the left flank fought up the gully leading from the beach towards Hill 114, which was also attacked from X Beach. Ottoman prisoners taken near W Beach reported that there was only one division south of Krithia.
Main force
At 8:30 a.m. Hunter-Weston ordered the main body to land and diverted some of the troops bound for V Beach to W Beach as reinforcements, which arrived at 9:00 a.m. and at 10:21 a.m. Hamilton ordered that the troops bound for V Beach be diverted to W Beach. Many casualties were incurred by the first reinforcements from long-range rifle fire as they approached the beach but were then obscured by the cliffs and were able to land and move between the flanks of the Lancashire Fusiliers. On the left flank the Fusiliers gained touch with troops from X Beach by 11:30 a.m. and complete the capture of Hill 114. On the right, troops landed and tried to reach Hill 138 but were pinned down half way to the crest. Another attack was made after another battalion had landed and the area had been bombarded by Swiftsure and Euryalus.
The first redoubt was captured at 3:00 p.m. and then after a difficult advance through barbed wire, took the second redoubt unopposed and with few casualties after the garrison retreated. The fall of the two redoubts enabled the troops pinned down near the lighthouse to advance towards V Beach until more wire was encountered. Troops tried to cut through but were visible on the sky line and shot down. Observers on Queen Elizabeth and Albion 1-mile (1.6 km) offshore watched the attempts while unable to open fire due to ignorance of the situation ashore. After an hour the wire was cut but the troops were pinned down again on the far side.
It was not until 5:00 p.m. that the disaster at V Beach was reported to Colonel Wolley-Dod on W Beach, who ordered the troops at the two redoubts to capture the cliff above V Beach. The troops were already advancing to Fort No 1. but the Ottoman defenders at V Beach swiftly stopped the advance and the troops dug in, which ended the attempt to retrieve the situation at V Beach. On the northern flank, Hill 114 was consolidated but an advance to the second objective from W Beach was not made and despite outnumbering the Ottoman troops 6:1, the British awaited fresh orders, which were not forthcoming, due to the loss of the commander of the landing force and the difficulties in communication with the headquarters staffs still afloat. The plan for a combined advance to the second objective broke down and there was no-one ashore to devise an alternative. With a definite objective the troops and officers of the 29th Division overcame many novel obstacles but then the twelve battalions between Hill 114 and Hill 138 did not press on against an exiguous defence.
S Beach
S Beach lay inside the Straits at a small break in the cliffs at the north end of Morto Bay, two miles (3.2 km) from V Beach. On top of the cliff lay de Tott's Battery a derelict fortification. No defences had been prepared in the area and only one Ottoman platoon guarded the beach, with another platoon 0.5-mile (0.80 km) inland. Four trawlers, each with six lifeboats in tow, made slow progress against the Dardanelles current and mine sweepers in the Straits but Ottoman artillery on the Asiatic shore fired at other targets and the trawlers came inshore without incident and when the trawlers reached the shallows the tows were cast off. The landing party of three companies of the 2nd Battalion, South Wales Borderers covered by the battleship Cornwallis made landfall under fire from the Ottoman platoon in a trench half-way up the cliff. Two companies landed on the beach and one escaladed the cliffs at Eski Hissarlik point to capture de Tott's Battery.
Captain Davidson of the Cornwallis made an unauthorised landing with a party of sailors and marines to supplement the landing force, casualties for all of the landing parties being 63 Borderers, sailors and marines. At the battery the British overlooked the Ottoman platoon and took fifteen prisoners; by 8:00 a.m. the landings were complete. From the cliffs, the disaster at V Beach could be seen but the instructions given to the commander were to wait for the advance from the south. After a prisoner claimed that there were another 2,000 Ottoman troops nearby, the commander continued to consolidate the position, rather than attack the rear of the Ottoman position at Sedd el Bahr. It was later found that the only Ottoman troops near the landing was a company less the platoon killed and captured during the landing and another company sent from Krithia but diverted to Sedd el Bahr before the landing commenced. The landing by the captain of the Cornwallis led to a delay in the arrival of the ship at V Beach, where it was scheduled to regulate the landing.
X Beach (Implacable Beach)
Covering force
X Beach was 200 yards (180 m) long under a low crumbling cliff on the Aegean shore around from W Beach, about 1-mile (1.6 km) above Tekke Burnu. No Ottoman defences had been built and only twelve soldiers guarded the beach. The Ottoman party was stunned by the bombardment from Implacable after the troops bound for W Beach had disembarked and the four tows had sailed parallel to the battleship until it was 500 yards (460 m) from the shore. The landing party had reached the shore and climbed to the top of the cliff with no casualties by 6:30 a.m. when the tows returned to collect the rest of the battalion and equipment, which had arrived by 7:30 a.m. As the British pushed inland, they came close to a locality where two Ottoman reserve companies were bivouacked. One company had been sent towards W Beach and met the British advance from X Beach. The British commander Lieutenant-Colonel H. E. B. Newenham, ordered an attack to the north-east to form a defensive flank on the left, two platoons to advance frontally and dig in 500 yards (460 m) from the beach and the rest of the landing force to attack Hill 114 on the right, to gain touch with the troops on W Beach.
The attack to the north-east began around 8:00 a.m., until stopped by Ottoman small-arms fire after 800 yards (730 m) but on the right flank, the attack reached the top of Hill 114 by 11:00 a.m., to the cheers of the watching sailors on the Implacable. The front along the beach was long and had numerous gaps, with the left flank engaged with the Ottoman defenders. With no reconnaissance possible before the landing and only one inaccurate map to read, the value of the view from the cliffs above the beach had not been appreciated beforehand. The landward slopes of hills 138 and 141 were easily visible and within reach of an advance from X Beach, which might have cut off the defenders of W Beach. S Beach at Morto Bay 2 miles (3.2 km) away was also visible but the landing force on X Beach concentrated on the landing. Few of the officers in the X Beach party knew of the landing at S Beach and no messages were passed between them during the day.
Main force
The main force began to land at 9:00 a.m. with little interruption by the Ottomans, apart from the sound of firing on the left flank. Two of the main force battalions had been withdrawn from the landing, to reinforce the landings at Y and S beaches and the 1st Border and 1st Inniskilling battalions were the divisional reserve, to be held back for emergencies. The initial landing party was not under the command of Brigadier-General W. R. Marshall and the main force had no instructions, to participate in its second phase advance to a line from Y Beach to Sedd el Bahr. No news had arrived of the other landings and the easy arrival at X Beach, led to him expecting soon to be joined by the troops from W and V beaches. Marshall climbed the cliff and during a briefing, received a message requesting assistance from the left flank so sent the reserve company. Marshall ordered the Borderers to the top of the cliff and then sent a company to assist the troops on Hill 114. Soon afterwards, British troops were seen retreating on the left, pursued by Ottoman infantry and Marshall began to order a counter-charge when he was wounded and Major C. D. Vaughan killed.
The Ottoman infantry were a few hundred yards from the shore when they were repulsed by a bayonet charge. The British were content to restore the position and did not pursue the Ottomans. Some news had arrived by 1:00 p.m. but nothing from W Beach or divisional headquarters. It could be seen that the troops on W and V beaches had been delayed because Ottoman soldiers were still holding hills 141 and 138, although in unknown strength. Marshall was certain of his instructions regarding the reserve battalions and ordered them to dig in on a 600–800-yard (550–730 m) perimeter. Though greatly outnumbered, the Ottomans paralysed the initiative of the invaders and gained time to organise defences and bring up reinforcements. At 6:00 p.m., Marshall contacted Hunter-Weston offering to advance to Y Beach but was ordered to wait until morning and complete the original plan. An order then arrived from W Beach from Wolley-Dod to advance the right flank towards X Beach and gain touch but this was not possible as the Ottomans counter-attacked Y Beach.
Y Beach
Y Beach was a considerable distance north along the Aegean coast, close to Krithia and behind most of the Ottoman defences at Cape Helles. The sea at the shore was deep enough for boats to sail within a few yards and the coast was a steep cliff about 150 feet (46 m) high, with two gullies giving easy access to the top. The area was undefended and the nearest Ottoman troops were two platoons 1-mile (1.6 km) south near Gully Ravine, a platoon of the 2nd Battalion, 26th Regiment at Sari Tepe and the 25th Regiment at Serafim Farm, 5 miles (8.0 km) away. The 1st Battalion, 26th Regiment was stationed between Semerly Tepe and Sari Tepe, 1.75 miles (2.82 km) north of Y Beach but was held back to guard against another landing for two days. The cruisers Amethyst and HMS Sapphire with a transport N2 and eight trawlers rendezvoused 4 miles (6.4 km) west of Y Beach with the covering force, the battleship HMS Goliath and the cruiser HMS Dublin. At 2:30 a.m. the troops transferred to the trawlers which steamed inshore, with Goliath 4,000 yards (3,700 m) out and the cruisers 2,000 yards (1,800 m) closer to the shore. At 4:15 a.m. trawlers steamed forward until they touched bottom and then embarked their troops in the boats, which were rowed to the beach as the bombardment on Cape Helles began.
The Plymouth Battalion RND (Lieutenant-Colonel Godfrey Matthews), the 1st Battalion, King's Own Scottish Borderers (Lieutenant-Colonel Archibald Koe) and a company of the 2nd Battalion, South Wales Borderers landed at Y Beach from 5:15–5:45 a.m. Scouts moving forward in the centre and on the flanks found four Ottoman soldiers, two of whom were killed and two captured. Two companies advanced to Gully Ravine, about 300 yards (270 m) beyond the cliff top and at 7:30 a.m., two companies of marines moved forward south-eastwards across the ravine, to search for a suspected Ottoman artillery piece. News of the success of the landing was passed to Hamilton as Queen Elizabeth steamed past at 8:20 a.m. The landing force waited until mid-afternoon for the expected advance from Cape Helles, in conditions so quiet, that Matthews and an adjutant crossed Gully Ravine and walked to within 500 yards (460 m) of Krithia and found no sign of Ottoman troops.
The marine search party moved for about 1-mile (1.6 km) south-east but found no sign of a gun and retired at 11:00 a.m. unchallenged. A message was sent to X Beach asking for an update, but no reply was received. At 9:00 a.m. and at noon, firing was heard from X Beach but no instructions arrived from 29th Division Headquarters, so Matthews ordered the position to be consolidated. At 3:00 p.m., with no sign of an advance from the cape Matthews withdrew from the ravine and began to dig in again on the cliff top. Dead ground around the landing site forced the British to establish a lengthy perimeter, along which the 29th Division troops were placed in the centre and marines on the flanks. From the ships the retirement could not be seen and digging in on the new positions was slowed, because entangled roots lay under the surface and the heavy digging implements were still on the beach, which resulted in the entrenchments being little more than 18 inches (0.46 m) deep by late afternoon.
At Serafim Farm, Sami Bey the Ottoman 9th Division commander, received news of the landing as soon as it began and at 1:00 p.m. sent an infantry battalion, an artillery battery and a section of machine-guns to the landing site. Just after 4:00 p.m. one of the guns opened fire and at 5:40 p.m., Ottoman infantry began to counter-attack the beachhead. The first attack was made by a company and was dispersed by naval gunfire. When the guns ceased fire after dark, the Ottoman infantry attacked with great determination. By 11:00 p.m. reinforcements had increased the number of Ottoman troops to 1 1⁄2 battalions and British losses led Matthews to signal for reinforcements, for which he received no reply. At dawn on 26 April, the Ottoman infantry withdrew, having suffered c. 50 percent casualties and inflicted British losses of 697 men. Koe had been mortally wounded and his adjutant killed; ammunition had run short in the beachhead and was complicated by the need to supply Mark VI as well as Mark VII rifle ammunition. As soon as dawn broke, the bombardment ships resumed firing.
During the night, some British troops began to straggle back to the beach and their morale was depressed further, when a ship salvo fell short into the beachhead. At 6:30 a.m., the ships received a request for help from a party ashore, which had run out of ammunition and was the first indication that things were amiss. Boats sent to the beach to re-embark the party and its wounded were seen by other troops on the beach, the impression was formed that a general re-embarkation had begun and some stragglers climbed aboard the boats. Unknown to Matthews and the troops on the heights who had spent the night repulsing Ottoman infantry attacks, the evacuation had already begun. A few minutes later Matthews signalled that the ships should fire 1,000 yards (910 m) beyond the cliff edge, onto Ottoman troops who were massing for another attack, which began at 7:00 a.m. and broke through the centre of the British line.
With no reserves, the British rallied and routed the attackers by a bayonet charge, which ended the threat to the beachhead. The initial Ottoman breakthrough had caused a panic behind the British defenders, which was reflected in signals received by the ships. After the attack had been repulsed, Matthews toured the positions on the right flank and found that they were empty. When he realised that the troops nearer the beach had been re-embarking, he saw no option but to allow it to continue and collected a party of men to defend the gully, until the wounded had been evacuated. By 11:00 a.m. all of the troops on the beach had left and the rearguard withdrew from the cliff and was rowed away within thirty minutes. During the departure, no gunfire was received from the Ottoman troops in the vicinity and when a naval officer led a party of marines ashore in the afternoon to look for survivors, they were able to search the area for an hour without interference.
Aftermath
In 2001, Travers wrote that the fire power of the modern Ottoman weapons and resilience of field fortifications, caused many Allied losses, particularly at V and W beaches. There was much criticism of Hamilton, for not ordering Hunter-Weston to send more troops to Y Beach but this was not due to Hamilton leaving discretion to his subordinate, since Hunter-Weston was ordered to divert part of the main force from V to W Beach at noon. Conditions at V Beach were not known to Hamilton, until he had been in contact with Hunter-Weston and interfering with the landing plan, could have added to the delays in landing troops. Hunter-Weston concentrated on the landings at V and W beaches and later on Hill 138, which was consistent with the tendency of generals on the Western Front to dwell on areas where enemy resistance was strongest and to reinforce failure. Travers wrote that the French landing at Kum Kale had been overlooked yet had been one of the most successful, despite initial Ottoman confidence that the landing would be defeated by the four battalions concentrated nearby. The Ottoman XV Corps commander General Weber Pasha was criticised for being unprepared, poor communications, tactics and leadership, when fighting in flatter terrain than that on the peninsula, on which the French artillery was able to dominate the Ottoman infantry. Despite this advantage, the French advance was stopped by the Ottomans on 26 April, in a costly defensive action.
The landings at S, X, Y and Kum Kale were the most successful, through surprise, close naval support and the inability of the Ottomans to garrison all of the coast, only the most obviously vulnerable points. The main landings at V and W beaches were the most costly. Naval ships which moved close inshore to bombard the Ottoman positions had some effect and at W Beach were able to suppress Ottoman return fire, after the early British losses. At V Beach the bombardments had less effect and the ploy of landing from River Clyde failed, leaving the survivors stranded until 26 April. The landing at Y Beach was a success because it was unopposed, yet the difficulty of bombarding the high ground was the cause of much of the British difficulty. Travers also listed inexperience and technical inadequacy, which left the senior commanders stuck aboard ship and the commanders who went ashore, becoming casualties. While greatly outnumbered, the Ottomans made good use of their field fortifications, machine-guns and rifles to defend the beaches and obstruct any advance inland.
In 1929, C. F. Aspinall-Oglander, the British Official Historian wrote that in the course of the Gallipoli campaign, the MEF failed to reach its first day objectives but that the plan to advance to Achi Baba had a reasonable chance of success. He wrote that the main reason for the failure, lay in the unusual number of senior officers who became casualties. From the beginning of the landings, the 29th Division lost two of three brigadiers, two of three brigade majors and most of the senior officers in the 4 1⁄2 battalions of the covering force, which landed at X, W and V beaches. Oglander also wrote that making landings on small beaches with few boats, required elaborate and rigid instructions, if the passage from ship to shore was to be efficient and the plans laid by the army and navy staffs and the headquarters of the 29th Division had been excellent but left very little discretion, should the landings not meet equal success. The commanders on Y and S beaches had been ordered to wait for the advance from the main beaches and join in the attack on Achi Baba. No provision was made for an attack towards the main beaches to give assistance, yet the number of troops landed on the minor beaches exceeded the size of the Ottoman garrison at the south end of the peninsula.
The failure to contemplate the possibility, that the troops at Y and S beaches might need to support the main landings, also exposed the failure to retain a reserve under the control of the Commander-in-Chief. Oglander speculated that had there been two battalions available, to land at the weakest point that the main landings had revealed in the Ottoman defences, Helles and Sedd el Bahr would have fallen by midday. Such a manoeuvre would have needed good communication between land and sea but the difficulty was underestimated and hampered British operations all day. The obvious difficulties of moving troops in open boats by instalments had been distracting, particularly the moments between disembarkation and reaching the shore, despite the confidence of the navy in its plans for bombardment. The apprehension was justified and the landing at V Beach was only saved from catastrophe by the covering fire of the machine-guns on River Clyde; defeat at W Beach was only averted by turning the Ottoman right flank. Lack of experience of opposed landings under modern conditions, made it difficult to rally scattered units and the challenge of organising an advancing inland was underestimated. It had been a mistake not to stress to all members of the landing force, that there would be little time to move inland before Ottoman reinforcements arrived.
The landing plan had been based on the importance of maintaining liaison between the army and navy, which had led to a decision that the 29th Division headquarters should stay aboard Euryalus and that Hamilton and the MEF headquarters should remain on the Queen Elizabeth, the flagship of the naval commander-in-chief. Despite the efforts of the navy, Hunter-Weston and the 29th Division headquarters were out of contact with the landing forces for most of the day, despite being barely 1-mile (1.6 km) from the front line. When Queen Elizabeth was needed to bombard V Beach, Hamilton was isolated there, from the afternoon to the evening of 25 April, incapable of intervening anywhere else. Oglander suggested that a separate communications vessel should have been prepared for the army and navy staffs, equipped with signalling apparatus to maintain touch with the landing forces, free from other demands for its services.
The stress and exhaustion of the landings and the unknown nature of the environment ashore combined with officer casualties left some of the units of the 29th Division to be in great difficulty by the afternoon, unaware that the Ottoman defenders were in an equally demoralised state. Before the invasion Hunter-Weston had printed a "Personal Note" to each soldier in the division to explain the hazards of the landing as a forewarning, writing of;
Heavy losses by bullets, by shells, by "mines" and by drowning....
- Hunter-Weston
to which the troops would be exposed. In the southern landings, the British landed 12 1⁄2 battalions by 1:00 p.m., against a maximum of two Ottoman battalions and Oglander wrote that the failure at V Beach caused the failure of the British plan to reach Achi Baba. The Ottoman defenders were too few to defeat the invasion but the leadership of Sami Bey, who sent the few reinforcements available to the 26th Regiment, gave orders to drive the British into the sea, a simple instruction which all could understand. The company at Sedd el Bahr endured the naval guns and held on to the position all day, being reinforced by about two companies. Overnight, the small parties of Ottoman infantry at W and X beaches contained the British and by 8:00 a.m. on 26 April had compelled the abandonment of Y Beach.
Casualties
Oglander wrote that the Turkish Official Account recorded 1,898 Ottoman casualties, from the five battalions south of Achi Baba before morning on 27 April, in the first two days of the landings at Cape Helles. Keegan in 1998, wrote that British casualties at Cape Helles during the morning were c. 2,000 men. The 1st Royal Dublin Fusiliers and 1st Royal Munster Fusiliers re-formed a composite battalion, known as the "Dubsters" and the original battalions were revived after the evacuation. The Munsters moved to the 48th Brigade of the 16th (Irish) Division in May 1916 and were joined by the Dubliners in October 1917. Of the 1,100 Dubliners, eleven survived the Gallipoli campaign unscathed.
HISTORY

RESOURCES
This article uses material from the Wikipedia articles "World War", "World War I", and "Landing at Cape Helles", which is released under the Creative Commons Attribution-Share-Alike License 3.0.
© Stories Preschool. All Rights Reserved.
