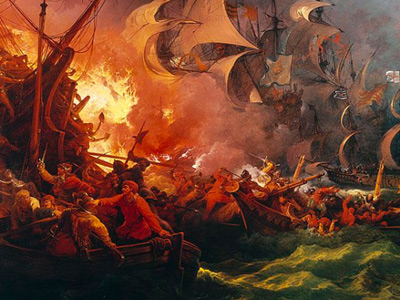
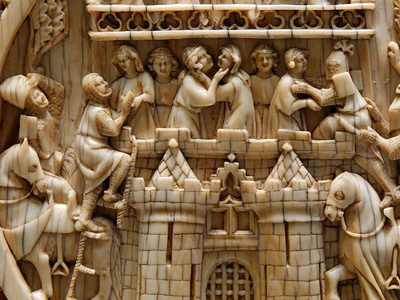
Battle of Hastings (1066)
Battle
Background and Location
Because many of the primary accounts contradict each other at times, it is impossible to provide a description of the battle that is beyond dispute. The only undisputed facts are that the fighting began at 9 am on Saturday 14 October 1066 and that the battle lasted until dusk. Sunset on the day of the battle was at 4:54 pm, with the battlefield mostly dark by 5:54 pm and in full darkness by 6:24 pm. Moonrise that night was not until 11:12 pm, so once the sun set, there was little light on the battlefield.
William of Jumièges reports that Duke William kept his army armed and ready against a surprise night attack for the entire night before. The battle took place 7 miles (11 km) north of Hastings at the present-day town of Battle, between two hills – Caldbec Hill to the north and Telham Hill to the south. The area was heavily wooded, with a marsh nearby. The name traditionally given to the battle is unusual – there were several settlements much closer to the battlefield than Hastings. The Anglo-Saxon Chronicle called it the battle "at the hoary apple tree". Within 40 years, the battle was described by the Anglo-Norman chronicler Orderic Vitalis as "Senlac", a Norman-French adaptation of the Old English word "Sandlacu", which means "sandy water". This may have been the name of the stream that crosses the battlefield. The battle was already being referred to as "bellum Hasestingas" or "Battle of Hastings" by 1087, in the Domesday Book.
Sunrise was at 6:48 am that morning, and reports of the day record that it was unusually bright. The weather conditions are not recorded. The route that the English The Kingdom of England was a sovereign state on the island of Great Britain from about 927, when it emerged from various Anglo-Saxon kingdoms, until 1 May 1707, when it united with Scotland to form the Kingdom of Great Britain. The Viking invasions of the 9th century upset the balance of power between the English kingdoms, and native Anglo-Saxon life in general. The English lands were unified in the 10th century in a reconquest completed by King Æthelstan in 927. army took to the battlefield is not known precisely. Several roads are possible: one, an old Roman road that ran from Rochester to Hastings has long been favoured because of a large coin hoard found nearby in 1876. Another possibility is a Roman road between London and Lewes and then over local tracks to the battlefield. Some accounts of the battle indicate that the Normans advanced from Hastings to the battlefield, but the contemporary account of William of Jumièges places the Normans at the site of the battle the night before. Most historians incline towards the former view, but M. K. Lawson argues that William of Jumièges's account is correct.
Dispositions of Forces and Tactics
Harold's forces deployed in a small, dense formation at the top of steep slope, with their flanks protected by woods and marshy ground in front of them. The line may have extended far enough to be anchored on a nearby stream. The English formed a shield wall, with the front ranks holding their shields close together or even overlapping to provide protection from attack. Sources differ on the exact site that the English fought on: some sources state the site of the abbey, but some newer sources suggest it was Caldbec Hill.
More is known about the Norman deployment. Duke William appears to have arranged his forces in three groups, or "battles", which roughly corresponded to their origins. The left units were the Bretons, along with those from Anjou, Poitou and Maine. This division was led by Alan the Red, a relative of the Breton count. The centre was held by the Normans, under the direct command of the duke and with many of his relatives and kinsmen grouped around the ducal party. The final division on the right consisted of the Frenchmen, along with some men from Picardy, Boulogne, and Flanders. The right was commanded by William fitzOsbern and Count Eustace II of Boulogne. The front lines were archers with a line of foot soldiers armed with spears behind. There were probably a few crossbowmen and slingers in with the archers. The cavalry was held in reserve, and a small group of clergymen and servants situated at the base of Telham Hill was not expected to take part in the fighting.
William's disposition of his forces implies that he planned to open the battle with archers in the front rank weakening the enemy with arrows, followed by infantry who would engage in close combat. The infantry would create openings in the English lines that could be exploited by a cavalry charge to break through the English forces and pursue the fleeing soldiers.
Beginning of the Battle
The battle opened with the Norman archers shooting uphill at the English shield wall, to little effect. The uphill angle meant that the arrows either bounced off the shields of the English or overshot their targets and flew over the top of the hill. The lack of English archers hampered the Norman archers, as there were few English arrows to be gathered up and reused. After the attack from the archers, William sent the spearmen forward to attack the English. They were met with a barrage of missiles, not arrows but spears, axes and stones. The infantry was unable to force openings in the shield wall, and the cavalry advanced in support. The cavalry also failed to make headway, and a general retreat began, blamed on the Breton division on William's left. A rumour started that the duke had been killed, which added to the confusion. The English forces began to pursue the fleeing invaders, but William rode through his forces, showing his face and yelling that he was still alive. The duke then led a counter-attack against the pursuing English forces; some of the English rallied on a hillock before being overwhelmed.
It is not known whether the English pursuit was ordered by Harold or if it was spontaneous. Wace relates that Harold ordered his men to stay in their formations but no other account gives this detail. The Bayeux Tapestry depicts the death of Harold's brothers Gyrth and Leofwine occurring just before the fight around the hillock. This may mean that the two brothers led the pursuit. The Carmen de Hastingae Proelio relates a different story for the death of Gyrth, stating that the duke slew Harold's brother in combat, perhaps thinking that Gyrth was Harold. William of Poitiers states that the bodies of Gyrth and Leofwine were found near Harold's, implying that they died late in the battle. It is possible that if the two brothers died early in the fighting their bodies were taken to Harold, thus accounting for their being found near his body after the battle. The military historian Peter Marren speculates that if Gyrth and Leofwine died early in the battle, that may have influenced Harold to stand and fight to the end.
Feigned Flights
A lull probably occurred early in the afternoon, and a break for rest and food would probably have been needed. William may have also needed time to implement a new strategy, which may have been inspired by the English pursuit and subsequent rout by the Normans. If the Normans could send their cavalry against the shield wall and then draw the English into more pursuits, breaks in the English line might form. William of Poitiers says the tactic was used twice. Although arguments have been made that the chroniclers' accounts of this tactic were meant to excuse the flight of the Norman troops from battle, this is unlikely as the earlier flight was not glossed over. It was a tactic used by other Norman armies during the period. Some historians have argued that the story of the use of feigned flight as a deliberate tactic was invented after the battle; most historians agree that it was used by the Normans at Hastings.
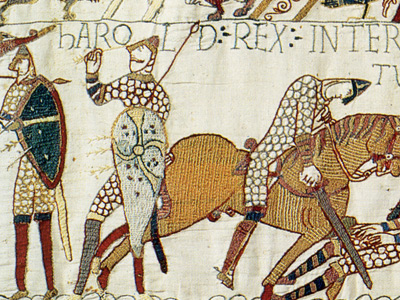
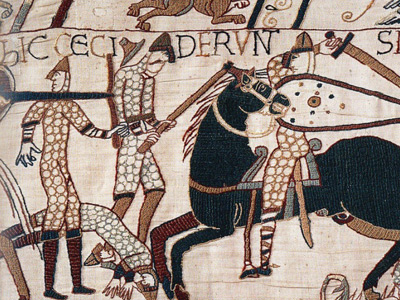
Scene from the Bayeux Tapestry showing mounted Norman cavalrymen fighting Anglo-Saxon infantry
Although the feigned flights did not break the lines, they probably thinned out the housecarls in the English shield wall. The housecarls were replaced with members of the fyrd, and the shield wall held. Archers appear to have been used again before and during an assault by the cavalry and infantry led by the duke. Although 12th-century sources state that the archers were ordered to shoot at a high angle to shoot over the front of the shield wall, there is no trace of such an action in the more contemporary accounts. It is not known how many assaults were launched against the English lines, but some sources record various actions by both Normans and Englishmen that took place during the afternoon's fighting. The Carmen claims that Duke William had two horses killed under him during the fighting, but William of Poitiers's account states that it was three.
Advertisement

These books are available for download with iBooks on your Mac or iOS device, and with iTunes on your computer. Books can be read with iBooks on your Mac or iOS device.
These books are available for download with iBooks on your Mac or iOS device, and with iTunes on your computer. Books can be read with iBooks on your Mac or iOS device.
( Click image to enlarge)
Death of Harold
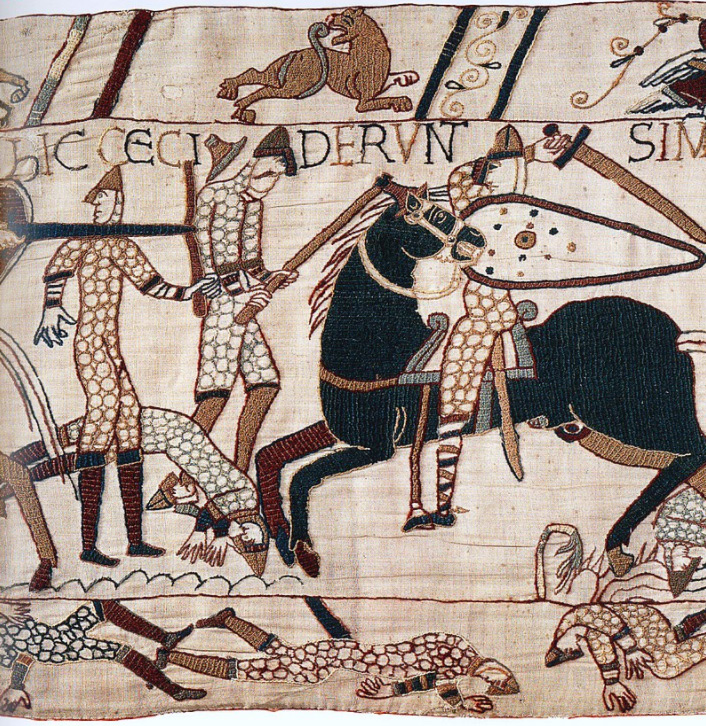
Harold appears to have died late in the battle, although accounts in the various sources are contradictory. William of Poitiers only mentions his death, without giving any details on how it occurred. The Tapestry is not helpful, as it shows a figure holding an arrow sticking out of his eye next to a falling fighter being hit with a sword. Over both figures is a statement "Here King Harold has been killed". It is not clear which figure is meant to be Harold, or if both are meant. The earliest written mention of the traditional account of Harold dying from an arrow to the eye dates to the 1080s from a history of the Normans written by an Italian monk, Amatus of Montecassino. William of Malmesbury stated that Harold died from an arrow to the eye that went into the brain, and that a knight wounded Harold at the same time. Wace repeats the arrow-to-the-eye account. The Carmen states that Duke William killed Harold, but this is unlikely, as such a feat would have been recorded elsewhere. The account of William of Jumièges is even more unlikely, as it has Harold dying in the morning, during the first fighting. The Chronicle of Battle Abbey states that no one knew who killed Harold, as it happened in the press of battle. A modern biographer of Harold, Ian Walker, states that Harold probably died from an arrow in the eye, although he also says it is possible that Harold was struck down by a Norman knight while mortally wounded in the eye. Another biographer of Harold, Peter Rex, after discussing the various accounts, concludes that it is not possible to declare how Harold died.
Harold's death left the English forces leaderless, and they began to collapse. Many of them fled, but the soldiers of the royal household gathered around Harold's body and fought to the end. The Normans began to pursue the fleeing troops, and except for a rearguard action at a site known as the "Malfosse", the battle was over. Exactly what happened at the Malfosse, or "Evil Ditch", and where it took place, is unclear. It occurred at a small fortification or set of trenches where some Englishmen rallied and seriously wounded Eustace of Boulogne before being defeated by the Normans.
Reasons for the Outcome
Harold's defeat was probably due to several circumstances. One was the need to defend against two almost simultaneous invasions. The fact that Harold had dismissed his forces in southern England on 8 September also contributed to the defeat. Many historians fault Harold for hurrying south and not gathering more forces before confronting William at Hastings, although it is not clear that the English forces were insufficient to deal with William's forces. Against these arguments for an exhausted English army, the length of the battle, which lasted an entire day, show that the English forces were not tired by their long march. Tied in with the speed of Harold's advance to Hastings is the possibility Harold may not have trusted Earls Edwin of Mercia and Morcar of Northumbria once their enemy Tostig had been defeated, and declined to bring them and their forces south. Modern historians have pointed out that one reason for Harold's rush to battle was to contain William's depredations and keep him from breaking free of his beachhead.
Most of the blame for the defeat probably lies in the events of the battle. William was the more experienced military leader, and in addition the lack of cavalry on the English side allowed Harold fewer tactical options. Some writers have criticised Harold for not exploiting the opportunity offered by the rumoured death of William early in the battle. The English appear to have erred in not staying strictly on the defensive, for when they pursued the retreating Normans they exposed their flanks to attack. Whether this was due to the inexperience of the English commanders or the indiscipline of the English soldiers is unclear. In the end, Harold's death appears to have been decisive, as it signalled the break-up of the English forces in disarray. The historian David Nicolle said of the battle that William's army "demonstrated – not without difficulty – the superiority of Norman-French mixed cavalry and infantry tactics over the Germanic-Scandinavian infantry traditions of the Anglo-Saxons."
HISTORY


RESOURCES
This article uses material from the Wikipedia article "Battle of Hastings", which is released under the Creative Commons Attribution-Share-Alike License 3.0.
© Stories Preschool. All Rights Reserved.